Simple tips to keep your bike in peak condition

Whether you use it for getting to work, doing the shopping, club runs or bouncing along forest tracks or something else entirely, your bike should provide you with many years’ loyal service. A bit of care and basic maintenance will prolong its life and save you money in the long run, as well as keep you safe on your rides.
Here is our advice on keeping your bike in tip top condition. It applies to all kinds of cycles, from a basic hybrid to e-bikes and non-standard cycles.
1. Keep it inside
Water is any cycle’s natural enemy, and we don’t have the best weather conditions here in the UK for keeping it outside. If a bike is left outside, all those moving parts will soon corrode and seize up, requiring replacement and prematurely ending the bike’s life.
While this isn’t possible for everyone, if you can it’s best to store your bike inside when it’s not in use.
A hallway, shed or garage will do the job, and there are several stands, hooks and hangers you can buy to help keep it out of the way. I have a Bike Nook and find it very easy to use.
2. Clean it regularly
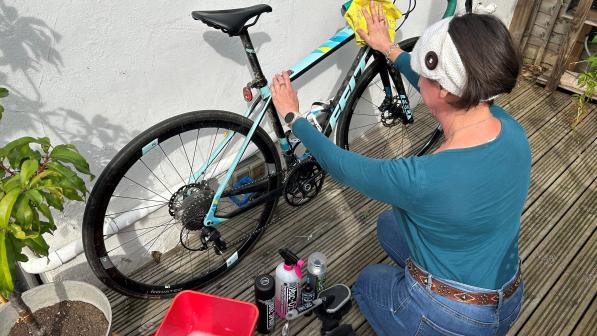
This really is the easiest and cheapest way to extend your cycle’s life. It prevents the build-up of grit, dirt and grease that will eat into moving parts and reduces wear on the components. You don’t need to invest in any fancy equipment – a few clean rags, a sponge, mild soap, an old toothbrush and a bucket are all you need.
All you need to do is wipe it down with warm soapy water, clean off the soap and dry it off. For more comprehensive advice, read our beginners’ guide to cleaning a bike. A clean bike is a happy bike and it’ll make your ride a lot smoother and more enjoyable.
How often depends on where and how often you ride. Some people say after every ride, and this will be necessary if you ride on dirt tracks in wet and muddy conditions. Summer riding on roads requires a lot less. Keep in mind that the more frequently you do it, the quicker it will be each time.
3. The right tools and equipment
There are a few bits of equipment that you’ll need. You don’t have to spend a fortune and you can build up your toolkit over time. Some tools you might already have. This will save you money in the long term – allowing you to safely carry out minor maintenance to keep your bike on the road and avoid having to pay a mechanic.

The basics include a multi-tool, a track pump for use at home and a mini-pump to take on rides, tyre levers, a puncture repair kit, a set of good-quality hex keys (otherwise known as Allan keys) and your cleaning kit. You might also want to invest in a torque wrench and a spoke wrench.
These tools, along with any other special equipment mentioned here, can be bought at any bike shop. Cycling UK members get discounts with retailers such as Halfords and Decathlon, so it’s always worth checking our member benefits page before you go shopping.
4. Pre-ride safety checks
There are a couple of these you can do and it’s advisable to do one before every ride. They don’t take long and are a great way of ensuring your bike is safe to ride every time. If you’re going to be pushed for time in the morning, you could do it the night before.
The first, and easiest, is the ABC check. So called because it refers to air, brakes and chain. Check your tyres’ air pressure, ensure your brakes are clean and working and that your chain is clean, well-oiled and moves smoothly.
The M check is more comprehensive. Starting with the back wheel, you then go up to the saddle, down to the frame, back up to the handlebar and then down to the front wheel. This is supposed to draw an ‘M’ shape, hence the name, but I’m unconvinced – and while the same checks work on, say, a recumbent, it certainly won’t make an ‘M’.
Check each part is in working order, clean, free from grease, lubed where it should be and has no cracks or nicks. Watch our video for a full guide to carrying out this check.
5. Clean and lubricate the chain regularly
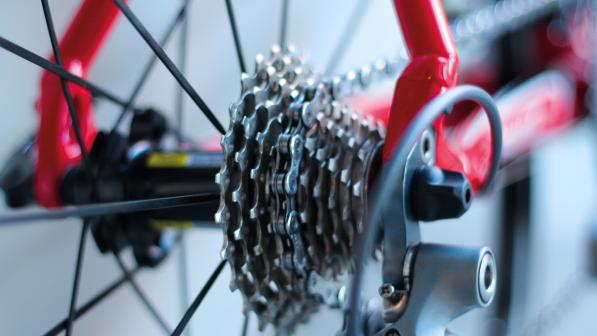
The drivechain (chain, cogs, cassette, derailleur, chainrings and cranks) is probably the hardest-working part of a bike – if it doesn’t work, you won’t be going anywhere. You can probably get away with cleaning the rest of the bike less often, but cleaning and lubing the chain regularly is necessary to ensure the long life of your bike.
It’s best to use a dedicated cycle chain degreaser for this. Spray it on the cassette, chain and chainrings liberally and then clean with a stiff brush – an old toothbrush is ideal. Wash with some warm water and dry fully. Apply lube to the chain and wipe off any excess. Use a bike chain-specific lube – there’s dry lube for summer, dry conditions, and wet for, yes, when it’s raining.

Never over-lubricate the chain – this will attract dirt and debris, eventually damaging the chain and rest of the drivechain. I apply a drop to every link, while turning one pedal backwards to rotate the chain.
Finally, check the chain doesn’t have any cracks and isn’t too loose by gently pressing down on it. It should only move about 1.5cm. If you find any damage or it’s loose, replace it. You can learn to do this yourself or take it to a bike shop. Keeping your chain in top condition will help prevent damage to the much more expensive cassette and chainrings.
6. Check your tyres
You should regularly check your tyres’ air pressure. Tyres aren’t sealed units and air is escaping from them even when the bike isn’t in use. Checking the air pressure using a track pump with a pressure gauge only takes a few moments.
Keeping the tyres at the right pressure will help prevent punctures, especially ‘pinch’ punctures where the edges of your wheel rims puncture both sides of the innertube as you go over a curb or pothole. It also makes your ride smoother and more pleasant.
After a ride, it’s a good idea to just hold your bike (or put it in a stand if you’ve got one) and rotate each wheel, checking the tyres for any bits of grit, glass or thorns that might work their way through to the innertube and put a hole in it. If you find any, carefully remove them. A flathead screwdriver works well for this.
While you’re there, look at the wheels too. Ensure the rims are clean and free of grit and dents – this will keep rim brakes working properly – and that the spokes aren’t loose. The spokes keep your wheels straight. If any are loose, tighten them up using a spoke wrench.
7. Make sure the brakes work
The last thing you want on any ride is for the brakes to fail. This very rarely happens, and you can prolong the life of the brakes with some basic checks.
A simple way to test them is to pull the brake lever – if it comes close to, or even touches, the handlebar then your brakes are too loose. You can also hold the bike up and spin a wheel, pulling on the brake lever to stop the spinning. Do this with both wheels.
If you feel any softness or there’s a delay in the wheel stopping, check your brake pads for wear. They will have a wear line; if the pads have worn down to this it’s time to replace them. If not, then your brake cables have probably loosened.

You can tighten them by twisting the barrel adjusters next to the brake levers – turn it anticlockwise to increase tension. You can also move the brake pads closer to the wheel rims by turning the barrel adjusters next to the brakes.
Keep the pads and wheel rims clean and free of grease – this is especially important with disc brakes. For more detailed information on brakes, read our beginners’ guide.
8. Keep the gears in working order
When you operate the shifters on your handlebar, these move either the front or rear derailleurs which then move the chain on the chainring or cassette, respectively. Keeping all these moving parts clean and well lubricated (see tip five above) will help keep this action smooth and protect all the working elements. You learn more about your gears in our beginners’ guide
Over time gear cables can loosen and the derailleurs can become misaligned. You can usually tell this quite easily: shifting will be noisy or unresponsive. You should also regularly test shifting. This is easiest with a stand, but you can do it without.
Hold up the back end of the bike and shift through all the gears, front and back, with one hand while using a pedal to spin the wheel with the other. Roping in a friend to help will make this much easier – a cake-shaped bribe might make this prospect more attractive.
If shifting is slow or unresponsive, you need to index your gears. This is relatively simple, using the barrel adjusters on or near the derailleurs. If the chain doesn’t move easily, you’ll need to tighten the cable. Do this by turning the barrel adjuster anticlockwise. If it moves too freely, you’ll need to loosen the cable – turn the adjuster clockwise.
In both cases, only turn the adjuster a quarter turn, then try shifting again to test if it works. Repeat until the gears all move smoothly again. Watch our video for more detailed advice.
9. Check all the nuts, bolts and screws
These hold your bike together and they can work loose over time. Conversely, they can also rust or seize up, while overtightened bolts and screws will cause wear and put undue pressure on your frame.
Check over all the nuts, bolts and screws to make sure they’re not too loose and tighten any that are. Using a torque wrench here will ensure you don’t overtighten them. Your owner’s manual should give you the correct torque specs.

As with all these basic maintenance tasks, this is a lot easier if you have a work stand. These are available from bike retailers, but not everyone has the funds, space or even desire to own one. Some bike shops allow home mechanics to use their space and tools for a small fee so it’s worth finding out if your local bike shop offers this.
10. Learn basic maintenance
As the above advice suggests, it’s a really good idea to learn some basic cycle maintenance. It will save you money, keep your cycle running smoothly and for much longer and improve your confidence on your bike.
You can learn a lot from YouTube. Cycling UK has a series of videos on bike maintenance. A simple search will bring up several videos for whatever type of maintenance you’re looking for – but do check the source.
You might want to invest in a maintenance course. Several bike shops run these – check out your local ones for further details. If you’ve got a few interested friends, you could book one of Cycling UK’s Basic and trail side maintenance courses. This will provide you with all the basic knowledge you need. Fill in the online form to register your interest.
11. Charge those batteries
This goes for anyone riding an e-cycle or running electronic gears, something that’s getting more popular on cycles. You should charge your e-bike battery after every ride to ensure you don’t run out of juice on the next one. Or end up late for work or that all-important appointment because you’re stuck recharging a depleted battery just before you want to head out.
If you have electric gearing, follow the manufacturer’s recommended charging instructions.
While you’re there, it’s probably a good idea to charge or check batteries on any other electronics you use. That could be your lights, especially during autumn and winter, a bike computer, camera, your phone and so on.
12. Get a proper service
If your budget stretches to it, it’s a good idea to get your bike serviced once or twice a year. It will save you money in the long run, keep your bike on the road (or trails) for longer and make riding it more pleasurable.
The most basic service – usually referred to as ‘bronze’ – generally costs about £50. Your local bike shop will almost certainly offer them, and it’s a great opportunity to ask the mechanic there any questions you might have about your own maintenance skills.
Cycling UK members can claim a 10% discount on servicing and repairs with Halfords.
This advice will keep you and your bike happily cycling together for longer – ensuring many fun and safe hours in the saddle.


