A beginners’ guide to … brakes on a cycle

It’s no exaggeration to say that a cycle’s braking system is one of its most essential parts. The brakes allow the rider to safely slow down and stop their bike.
Chances are, though, that no one has ever taught you this important skill – that of braking correctly. Even if you learnt to ride as a child, braking is a very different prospect on an adult bike, especially if you’re cycling in traffic or bombing down steep trails.
It’s worth familiarising yourself with your brakes. In this guide we’ll look at the most common types of cycle brakes. There are others, but at this stage there’s no point over complicating things.
There are essentially two different types of cycle brakes: rim and disc. There are various options within those two broad categories.
The system comprises three main components: the brake levers, usually mounted on the handle bar, which allow the rider to apply the brakes; the cables or tubes that transfer that signal; and the brake calliper that houses the brake pad or shoe and pistons that push against a braking surface to produce friction and slow down or stop the wheels spinning, bringing the bike to a halt.

The two types of brake mainly differ in where they apply that pressure, as well as looks.
In the UK, it’s a legal requirement to have two ‘efficient’ braking systems, operating independently on the front and rear wheels, to cycle on the public highway. In a fixed wheel bike (A bike that has no freewheel mechanism, so the pedals always spin together with the rear wheel, and the bike does not coast), the fixed rear wheel counts as the back brake. It must also have a working front brake to qualify as legal.
The two types of brakes
Rim brakes
As the name suggests, these brakes work by applying pressure to the wheel rims. They are cable activated, meaning that when the rider pulls on the brake lever, it tightens a cable that then operates the calliper to move the brake pad onto the surface of the rim, creating friction and heat and slowing the wheel down. They mount to the frame of the bike above the wheel.
There are five types. The most common are calliper, cantilever and V or direct pull. Two others – U and rod – are less common. They all work in similar, though slightly different, ways and look slightly different.
Callipers
Callipers are horseshoe shaped with the pads on the lower part of the ‘shoe’. They are activated by a side-mounted cable clamping the pads onto the rim. They are simple, light and low maintenance, but can lack stopping power.

Cantilevers
Cantilevers have a central straddle cable that pulls from above to move the pads towards the rim. They are stronger than callipers, and still low maintenance, but they're heavier.
Direct-pull or linear-pull
Direct-pull or linear-pull brakes are often known as V brakes, but this is actually Shimano’s brand name for them. They employ V-shaped callipers to close the pads over the rim. The brakes’ long ‘arms’ mean braking power is high.
Disc brakes
These consist of a metal disc, or rotor, which is attached to the wheel hub and rotates along with the wheel. The brake callipers are fixed to the frame or fork and work by pushing the pads against the disc to slow the wheel down. There are two different types: hydraulic and mechanical.
Hydraulic
With hydraulic disc brakes, when the rider pulls the brake lever, it pushes hydraulic fluid through a hose. This moves the brake pads onto the disc, applying friction to slow down the wheel rotation.
Mechanical
Mechanical disc brakes work in a similar way but use a cable to apply the pads to the rotor. They are something of a halfway house between rim brakes and hydraulic disc brakes.
Which brake is best?
The short answer is: it depends. A lot of factors come into play. These include where and when you ride, your riding style, your budget and if you are – or want to be – a home mechanic.
For most riders, most of the time, all the braking systems covered here will do the job. But your particular needs and preferences will help dictate which is best for you.

Rim brakes are lightweight, simple, easy to maintain and inexpensive. They provide plenty of braking power in dry conditions. For these reasons, they’re often used in commuter bikes and on cheaper models.
However, they’re not as efficient in wet or mucky conditions. Mud, grit and water stick to your rims, creating a layer between the brake pad and the braking surface. This will also rub both the pads and the rims, causing damage and meaning you’ll have to replace the pads regularly, and eventually the wheels too.
Regular cleaning will help prolong the life of pads and rims, and these brakes are easier to clean than their disc counterparts.
Disc brakes provide excellent stopping power, which doesn’t lose efficiency in wet weather. This is partly because of their position on the hubs. They’re higher up than the rims, which end up very close to the surface you’re cycling on, and so come into less contact with water and dirt.
It’s also to do with the materials used. The hard-wearing metal - or ceramic-based pads are less affected by dirt and water. They’re less prone to overheating, too. Rim brakes’ pads can get too hot, again lessening braking power.

Disc brakes are pretty much universal on mountain and gravel bikes because of their consistent and powerful performance in all conditions. These days they’re also prevalent on road bikes, especially higher-end models.
It’s easier to modulate your braking with discs, making for a smoother ride and safer stopping. It’s also easier to apply braking, making these brakes good for smaller or weaker riders and particularly people with arthritis in their hands.
They’re heavier than rim brakes, and more costly. They’re also harder to maintain, requiring specialist tools and equipment. They’re not the sort of thing a budding home mechanic could fix at the side of the road.
Running costs tend to be lower, though. They don’t apply pressure to the rims so won’t cause damage that requires a new wheel and the pads themselves are much harder wearing than rim brake pads so don’t need to be replaced as often.
They require less maintenance than rim brakes, but conversely home maintenance is trickier so you’re more likely to need a trip to the bike shop. Rim brakes’ rubber pads wear down more quickly, while the cables get stretched over time, becoming less effective and needing replacement. But this is also true of mechanical discs.
How to use your brakes
This might seem obvious: you pull the levers, the pads squeeze the rims or rotors, and the bike slows down. But it’s always good to brush up on essential skills – practice makes perfect, after all.
Generally, in the UK, the front brake is operated via the right-hand lever, the back via the left. The front brake has the most effective stopping power and pulling on the right-hand lever too hard at high speed could result in going over the bar. Instead apply the rear brake first, then the front. Similarly, release your front brake first, followed by the back.

In both cases, start gently and gradually apply more pressure to ensure you come to a smooth stop. Ultimately, the front brake is for stopping, the rear can be used for slowing down when cornering, negotiating uneven terrain or a steep downhill.
As you slow down, your weight will move forward over the front wheel. This can make it harder to control the bike. You can prevent this by shifting your weight back so it’s more evenly distributed, which will help even out the braking forces over both front and back wheels.
If you’ve got a new bike, it’s a good idea to ‘bed in’ the brakes before taking it out on the road or trails. To do this, go somewhere quiet and traffic free like a long driveway or park. Jump on the bike and start cycling. When at speed, pull both brake levers, applying equal, smooth pressure.
As you come to a stop, smoothly release the levers and start moving again. Repeat this a few times and you’re good to go. This is also a good way to practice your basic braking skills.
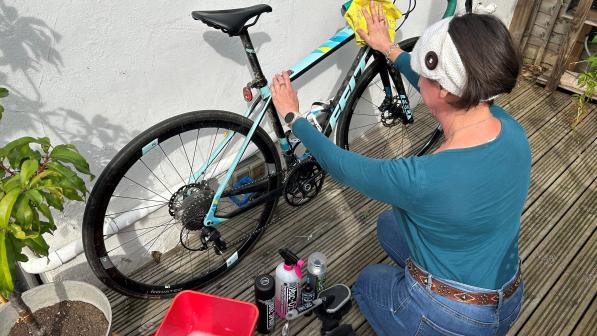
A final note: remember to keep your brakes clean and check them regularly. Look after them and they’ll look after you.
