How to get your bike ready for spring
With extended daylight and warmer temperatures finally here, it’s time to bring your cycle out of its winter hibernation to prepare for some enjoyable and comfortable spring and summer riding. Even if you have continued to cycle through the winter, battling torrential rain, mud and gritted roads means that your bike will still benefit from a bit of attention.
There are a few simple adjustments and maintenance checks to make sure your bike is comfortable and safe as thoughts turn to day-long rides, group outings and cycling holidays in the sun.
The general maintenance advice given here won’t take too long and should be achievable by most cyclists. But don’t do anything you don’t feel confident about – take your cycle to a local bike shop to be on the safe side.
Spring clean
The first thing to do is give your cycle a good wash. Dirt and dust will have built up if it’s been in storage for months, while muck from winter roads and trails will have taken its toll. A clean bike is more comfortable to ride and will last longer.
Don’t use a high-pressure washer – that will just force water into places it’s not meant to be. Instead a good old-fashioned bucket of soapy water and rag will do the job nicely.
Wipe down the whole bike thoroughly, paying particular attention to moving parts and sections that are likely to have picked up the most dirt – especially the chain. Dry it off to prevent rusting. Apply some dry lubricant to the moving parts. For more comprehensive advice, see our guide to cleaning your bike.
Now that everything is clean, it’s a good idea to check the frame for any cracks, dings or rust. These can all lead to problems, so if you do find anything suspicious, consider taking the bike into the shop. Now it’s time to get ride-ready.

Wheels
First check your tyres for any cracks, tears or wear and replace them if necessary. Check the air pressure and pump them up to the required pressure. Floor pumps have a pressure gauge, taking the guesswork out of this. The manufacturer’s recommended pressure will be on the tyres themselves.
If this is your first ride in several months, it’s a good tip to pump up tyres the day before and then check again the following morning. If they’ve gone soft, you’ve a slow puncture and you’ll need to change your inner tube before setting off.
Ensure the wheels are turning smoothly by picking up the front of the bike and just spinning the wheel. Make sure it doesn’t wobble and listen out for any sounds of rubbing. Now repeat for the rear wheel. The wheels should spin freely without hitting the forks or brake pads.
The spokes keep your wheels straight, or ‘true’. If the wheels appear to wobble, you might need to tighten the spokes with a spoke wrench – or take it into the shop if you don’t feel confident doing this.
Brakes
The last thing you want is for your brakes to fail on that first ride of the year. Pull on your brake levers to ensure they properly engage with the brake pads – your wheels should come to a full stop.
You should feel resistance when pulling on the brakes and the levers should stop before hitting your handlebar. If this isn’t the case then the cables might need tightening. This can be done by tightening the barrel adjuster slightly. Watch our easy-to-follow video for how to do this. Give the cables a clean, and check for any nicks or damage – replace them if you find any.
Check that your brake pads haven’t worn down – they should be about quarter of an inch (6mm) thick. This is particularly important if you’ve ridden throughout the winter as all that grit and mud will have taken their toll. Uneven wear could be a sign that your wheels aren’t true.
Drivechain
The drivechain is essentially all the parts you need to push your bike – it’s what transfers the power provided by your legs to the rear wheel. It consists of the pedals, cranks, chainrings, chain, cassette and derailleur. If any of this isn’t working properly, you won’t get far.
You’ve already cleaned and lubed your chain (right?) so now check the tension. If it’s too loose there’s a chance it’ll come off while you’re riding. Gently push down on the top of the chain – it shouldn’t move more than about half an inch (12mm). Also check for wear and tear. If it’s loose or worn, consider replacing it.
A worn chain can damage the (much more expensive) chainring and cassette, so it’s much better to replace the chain now than risk having to buy a new chainring or cassette later. The cogs of the chainring and cassette can also get worn away, leading to chain slippage, so take a close look at those too.
Gears
You’ll want to be sure your gear shifters are working smoothly. For this part someone to help you or a bike stand would come in handy.
You need to lift the rear wheel off the ground, rotate the pedals and then cycle through all your gears. You can do this by turning the bike upside down but balancing it while turning the wheel and shifting the gears is tricky.
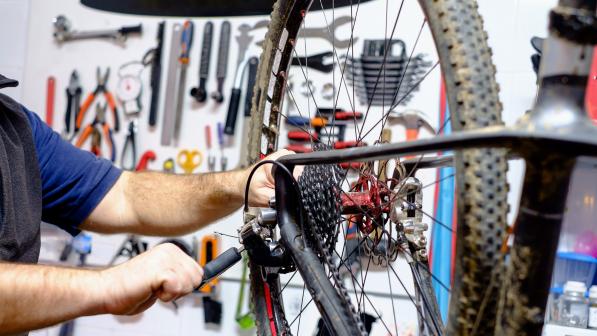
Shifting should be smooth and easy, and there shouldn’t be any suspicious clanking or screeching. If that isn’t the case, your derailleur might need fine-tuning. This is done by twisting the barrel adjuster; our video guide shows how to do this. Do all such adjustments incrementally, turning the adjuster a quarter turn each time and testing before making another quarter turn.
Again, wipe down the cables and check for any damage. You could also apply a bit of lube to the cables to increase their longevity.

Tighten up
Nuts and bolts loosen over time, so take a few moments to tighten them all – this should be simple enough with a multitool or set of allen keys.
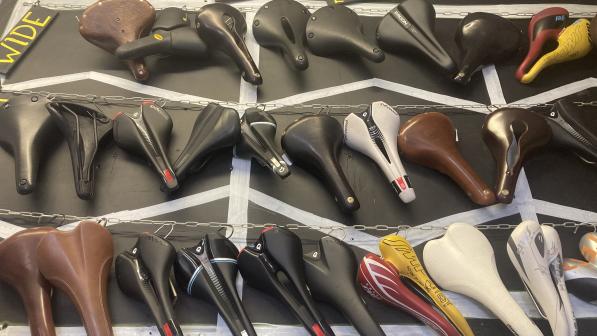
Pay particular attention to the stem, seatpost, handlebar and wheels, but don’t neglect the pedals and cranks. Also check the seat and handlebar height are correct and adjust if necessary. Saddles are a major cause of discomfort when riding – either because they’re the wrong saddle for you or they’re the wrong height – so it’s worth getting this right.
Make sure any accessories are properly bolted on and in a good condition, too. Check for any damage to racks, baskets, bells, and – especially – child seats. Replace wherever necessary. It’s a legal requirement to have lights and reflectors if cycling at night, so ensure these are present and working. Read our guide to the current regulations to make sure you’re within in the law.
Bag check
If this is your first long(ish) ride of the year, now is the time to get out that saddlebag (or bar bag, tube bag or however you carry your accessories) and make sure all your necessary tools and accessories are present, correct and working.
You should now be ready to set off for that first ride of the year, or the spring if you’ve carried on cycling all through winter. And if you want to learn more, Cycling UK has loads more advice, tips and how-to guides on simple cycle maintenance.

